Create an NFT-holder-exclusive Product Drop like Gucci & Yuga Labs’ Phygital KodaPendant
$5.5 million in sales in 24 hours with a digital wearable that lets you claim a physical product

What Is An NFT-holder Exclusive Drop
Pretty simple, its a product with limited quantity stock made available to purchase at a specific point in time and only for holders of certain NFTs.
A powerful mechanism to drive sales by giving access only to a small set of people, e.g. your most loyal customers, key members of a community, etc.
Most famously Yuga Labs (creator of Bored Ape Yacht Club) and Gucci leveraged this and launched the so called KodaPendant in early 2023 — a first digital and physical piece.
Digital &Physical Products
A novel approach shaping consumer brands’ offerings at the intersection of fashion, entertainment, and web3.
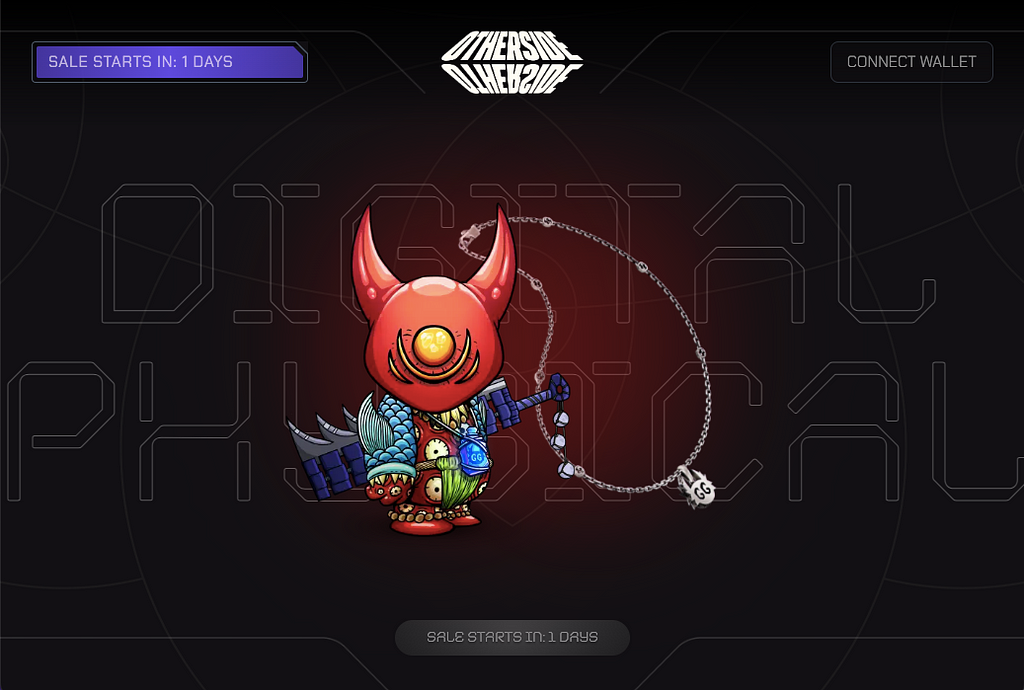
The KodaPendant could only be purchased online. The sale itself was for the digital version of the pendant and had to be paid for in Yuga Labs’ own utility token ApeCoin (price: 450 Ape).
Only after purchasing the digital version, which was not issued as an own NFT, but rather as an upgrade to an existing Koda or Vessel NFT from Yuga Labs’ original Otherdeed for Otherside Collection, you were able to claim the physical silver pendant sometime during the summer of 2023.
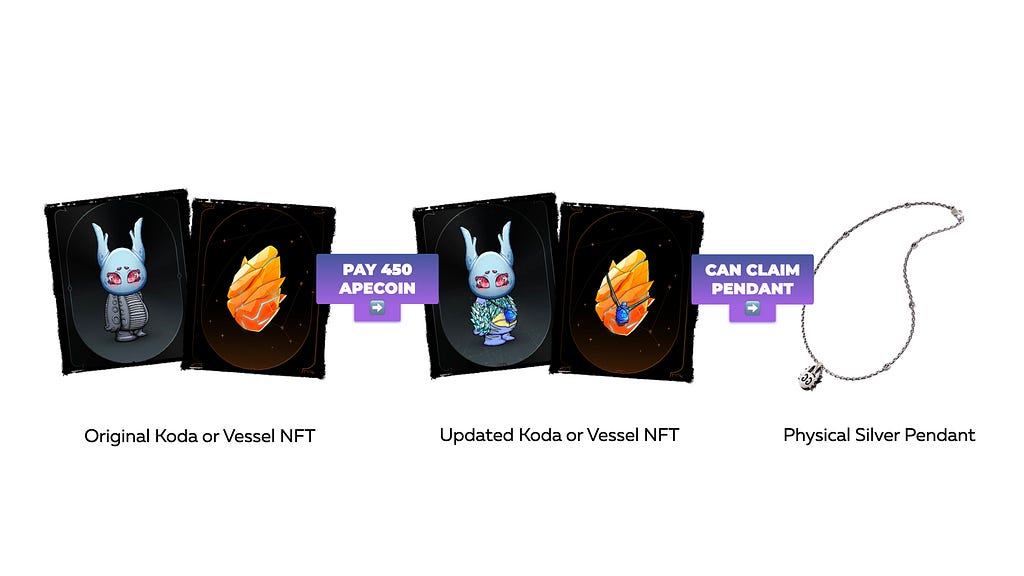
So essentially, you paid to receive a new trait (metadata) for your existing NFT and then be able to claim the physical product at a later point in time.
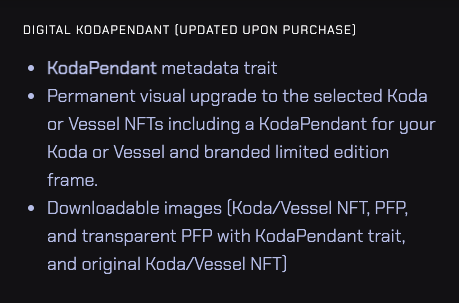
By upgrading your NFT and obtaining the new KodaPendant trait you also got a permanent visual upgrade (now wearing the pendant) and access to downloadable content.
The Drop Rules
In total, 3.333 KodaPendants were offered on a first-come, first-served basis. The offer was live for 24 hours or until sellout, whichever happened first.
Eligible for purchase were all Otherside Koda (View Collection) and Otherside Vessel (View Collection) NFT holders.
There also was a limit of one KodaPendant per transaction for one Koda or Vessel NFT. If you held more than one Koda and/or Vessel NFT, you could have returned to the site and purchased additional KodaPendants while supplies lasted.
$5.5 Million In Sales In 24 Hours
Spoiler: they didn’t sell out! After 24 hours the sale closed with 2.928 KodaPendants sold and just over 5.5 million U.S. dollars generated in revenue.
The opinions of the community diverge as to why they fell short just over 400 KodaPendants and didn’t sell out.
Reasons such as having to spend $1.800 (equivalent to 450 Ape) and that it doesn’t ship to Asia (except Japan) are the most commonly cited.
it doesnt ship to whole of Asia other than Japan, just pointing out one factor for the lack of interest.
— GyaradosPM (@pointmash) April 8, 2023
All in all, a great success and a great pioneering effort that is another example of how to use NFT technology to increase sales in the digital space and drive customer loyalty. Congrats to everyone involved!
Create Your Own Drop
Now is the perfect time to act as a brand and experiment in this area, to get to know your audience and find out how willing they are to spend money on digital goods. We recommend that anyone venturing into web3 with their own NFTs starts with very low volumes and aims to identify the core of their consumers of tomorrow/ form the integral part of their community.
No matter if you want to sell more, less or the same amount of products, with Whal3s you can easily choose your own conditions.
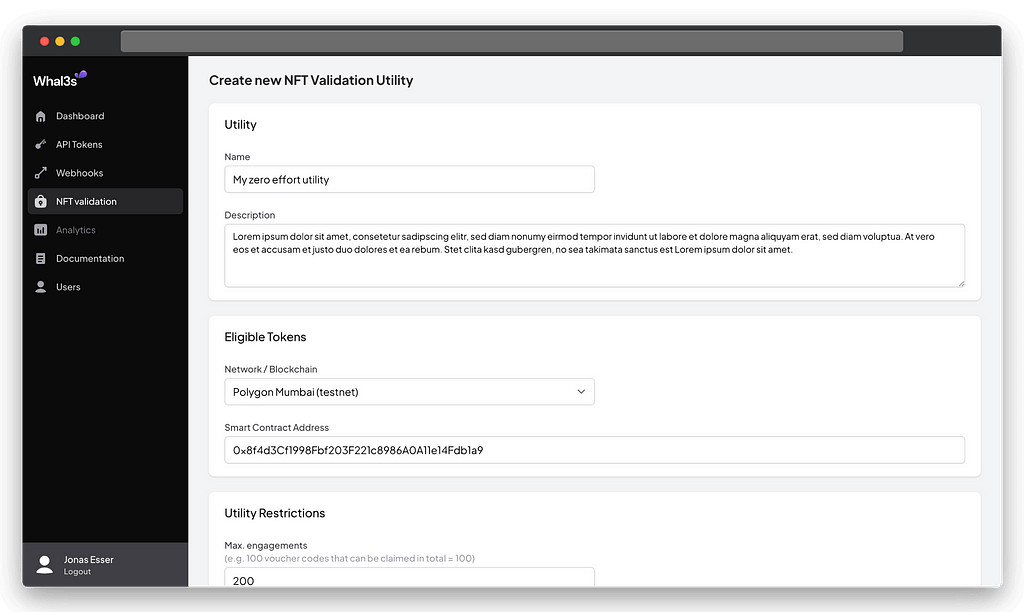
With our intuitive App you can set your drop rules with just a few clicks.
- Select eligible NFTs that are allowed to purchase
- Set max. supply & order limit per token
- Edit the message the user has to sign/ confirm
Integrate Into Your Website
Once completed, you will receive a unique Utility ID. This is everything you need to take from the App and bring into your website. To do so simply copy it and follow the below tutorial on how to embed your utility.
Note: Connecting Whal3s to your website and building a fully functioning NFT-holder exclusive product drop on the backend side takes approx. 0.5 engineering days incl. testing, so the absolute majority of the development time can be spent on designing a great user experience and building the frontend.
Let’s Start With The Implementation
Open your build / project and install Whal3s.js
npm i @whal3s/whal3s.js
To use Whal3s, create a new Whal3s object.
const whal3s = new Whal3s()
In the next step you initialize the utility that is from now on the core of your technical implementation (paste your Utility ID).
const utiliy = await whal3s.createValidationUtility('your-utility-id')
With Whal3s you don’t have to worry about web3 related challenges. You just need to call the functions that match the current step of the user journey — starting with a simple connect wallet function.
//when user clicks on connect-wallet.button
await utility.connectWallet()
NFT Validation
Once the user connected their wallet, Whal3s fetches all of their NFTs and checks their validity. Whal3s also gives you NFT metadata like name, description or image of each NFT for you to display if needed. Whal3s will even provide you with all claims that have already been registered for the user’s tokens and wallet address — we call them engagements. Think of it as the history of user engagement in web3. Next, let the user select the token they want to claim with.
const SelectableNft = ({utility, nft}) => {
    return (
        <div>
            <img src={nft.attributes.media[0].thumbnail}></img>
            <p>{nft.attributes.title}</p>
            <p>Valid: {nft.valid ? 'yes': 'no'}</p>
            <button onClick={nft.valid ? utility.tokenId = nft.attributes.id.tokenId : null}>Claim with this NFT</button>
            {nft.engagements.map((engagement) => (
                <p key={engagement.id}>Claimed {engagement.updated_at} by {engagement.wallet_address}</p>))}
        </div>
    );
};
Once the NFT is selected users can sign a message that is used for authentication in the process.
await utility.sign()
Depending on the requirements for your product drop you could outsource the entire claiming workflow to Whal3s — something to keep in mind when, for example, not requiring a metadata upgrade or token transfer.
// Reserve a claim
await utility.reserveEngagement()
// or claiming directly
await utility.storeEngagement(additionalMetadata)
In this example, however, the NFT metadata should be updated while claiming and the user is required to transfer tokens.
Token Transfer (Payment)
Besides having a valid NFT, the second condition is that the user must pay 450 ApeCoin. The easiest way to do so is by requesting approval for this amount of tokens. This feature is currently in beta, but don’t worry, here’s how to do it yourself for now:
async approveSpending() {
  const abi = [...] //copy abi from etherscan
  const signer = this.validationUtility.wallet.signer
  const apeContract = new ethers.Contract("0x4d224452801aced8b2f0aebe155379bb5d594381", abi, signer)
  await apeContract.approve("your wallet", BigNumber.from('450000000000000000000'));
}
Now that the user has met all conditions, you can finish the claim on your server.
To do so you can send the request to your own server.
axios.post('https://your-server.com/claim', {
    "utilityId": utility.id,
    "walletAddress": utility.wallet.address,
    "tokenId": utility.tokenId,
    "signature": utility.signature,
    "additionalData": additionalData
}
Before you update the metadata check the eligibility again using the Whal3s API (because as you know: Never trust the frontend), perform your metadata update (see example here) and record the claim using Whal3s.
try {
  const signatureResponse = await fetch(`https://app.whal3s.xyz/api/v0/signature-messages?utility_id=${WHAL3S_UTILITY_ID}&wallet_address=${walletAddress}&signature=${signature}`, options)
  const eligibilityResponse = await fetch(`https://app.whal3s.xyz/api/v0/nft-validation-utilities/${WHAL3S_UTILITY_ID}/token/${tokenId}`)
  const eligibilityResponseJson = await eligibilityResponse.json()
  if (signatureResponse.status !== 200)
        throw 'Invalid signature'
    if (eligibilityResponse.status !== 200 || !eligibilityResponseJson.valid)
        throw 'Wallet not eligible'
   // Transfer approved tokens (more details below)
   const transferTransaction = await transferTokens(walletAddress)

   // YOUR METADATA UPDATE
   // ...


   // Store engangent on Whal3s
   const options = {
     method: 'POST',
     headers: {
       accept: 'application/json',
       'content-type': 'application/json',
       authorization: 'Bearer YOUR-API-TOKEN'
     },
     body: JSON.stringify({token_id: tokenId, status: 'VALID'})
   };

   const engagementResponse = await fetch(`https://app.whal3s.xyz/api/v0/nft-validation-utilities/${WHAL3S_UTILITY_ID}/engagements`, options)

   // done
   // return success message
} catch (error){
   // handle error
}
As already mentioned, you have to transfer the ApeCoin tokens from the user’s wallet to yours (have sufficient balance to cover gas fees).
This is how to transfer the tokens:
function transferTokens(walletAddress) {
	const abi = [...] // fetch abi from etherscan
	// Connect with your RPC provider and initialize contract
	const provider = new ethers.providers.JsonRpcProvider("API_URL", 1);
	const signer = new ethers.Wallet("YOUR_WALLET_PRIVATE_KEY", provider);
	const apeContract = new ethers.Contract("0x4d224452801aced8b2f0aebe155379bb5d594381", abi, signer)
	// Call the transferFrom method of the the smart contract
	return await apeContract.transferFrom(walletAddress, "YOUR_WALLET_ADDRESS", BigNumber.from('450000000000000000000'))
}
If the transaction fails, an error is thrown, which you simply need to catch. However, if the transaction succeeds, you can proceed to update the metadata. And that’s it!
To summarize, Whal3s covers the following challenging parts of your web3 experience:
- Connect wallet
- Verify NFT ownership
- Validate individual NFTs
- Provide and verify signature messages to authenticate the user
- Record and store claims
- Provide API endpoints to verify users’ signatures and validate NFTs serverside (in your own ecosystem)
- Let users claim your product directly using the frontend (no backend needed) or proxy your own server to perform some custom steps
Publish Your Site & Easily Monitor Engagements
After integrating the Whal3s API and releasing your NFT holder exclusive drop, you can return to the Whal3s app and observe user interactions.
At any point, validation can also be tested by inserting the Utility ID in the input field on the Whal3s test page and going through the claiming process yourself (test here).
What’s Next?
Next steps are to build the frontend and make the site blend in to your existing website in the best way possible. Whal3s ensures a smooth and secure process in the background and gives you all the freedom you need to make your drop a special customer experience within your digital ecosystem.
For additional support and answers to questions about compatibility with your web3 plans, contact us anytime on Twitter: @usewhal3s, personal LinkedIn profiles or via email: hello@whal3s.xyz.
Let’s make your NFTs more useful and valuable, together!